Family Traditions, Food, Holiday cheer

Ballard-Reisch Holiday Traditions – Thanksgiving breakfast – Monkey Bread

One of the things I like best about the holidays is family food traditions. For example, for Thanksgiving we make a feast! Turkey, dressing (those not from Ohio might call it stuffing), mashed potatoes and gravy, baked corn, green bean casserole (yes, the French’s onions recipe), 7-up salad (my mom’s recipe from when I was a child), and this year, pumpkin pie with whipped cream. For over 30 Thanksgivings, a family breakfast favorite has been monkey bread. We got the original recipe from my sister-in-law Sandy Estep. I have no idea where it came from. Anyway, for the Ballard-Reisch family, Thanksgiving breakfast means monkey bread. We invite you to join us in this tradition.

Here goes!

Ingredients:

3 loaves – Rhoades white frozen bread dough

1 cup granulated sugar (plus up to ¼ cup additional as needed – see below)

1 tablespoon ground cinnamon (plus 2 teaspoons)

1 ½ sticks (3/8 lbs butter) – (Real butter is the best. We prefer Kerry gold.)

What to do:

Thaw loaves in the refrigerator, in the plastic bag they come in. (Or you can make bread dough from scratch. I used to do that, but I often take the easy way now.) Once thawed, remove from the bag and return to the fridge in a covered bowl. Let rise. When dough has risen, kneed it to release all the yeast and air bubbles. It will return to roughly the volume of the original dough. Let dough rise a second time, and again kneed to release the yeast and air bubbles. We typically do this overnight so that the dough is ready to go on Thanksgiving morning.

Mix 1 cup sugar and 1 tablespoon cinnamon together in a soup or cereal bowl.

Preheat oven to 350°F.

Tear the dough into approximately 1 teaspoon chunks; roll into balls.

Drop balls into cinnamon and sugar mixture. Coat all sides thoroughly. I use a spoon to scoop the mixture around the dough balls.

Drop the balls into a greased (We use Pam.) bundt pan. (The bundt pan, because of it’s center opening, helps cook the dough balls thoroughly, but you can also use an 8×8 inch glass baking pan.) ((My favorite of the moment is a silicone bundt pan.))

Melt butter in a 1-quart saucepan.

Once cinnamon and sugared dough balls have been put into the bundt pan, measure remaining mixture. You will need at least 1 cup. Add sugar to make 1 cup and 2 teaspoons of cinnamon. Melt over medium high heat in a sauce pan for approximately 3 minutes, stirring constantly. Sugar mixture will get clumpy, then eventually smooth out and melt fully.

Once sugar has melted, stir in melted butter. Bring to a boil for 1 minute. Reduce heat. (If the butter and sugar mixture won’t mix together, try using a whisk.)

Pour mixture over dough balls in bundt pan.

Bake for 1 hour or until dough balls are cooked thoroughly (or to your desired doneness). Some Ballard-Reisch’s prefer fully cooked dough balls. Others like them slightly doughy.

Turn out onto a round plate.

Variations:

Add 1 cup chopped nut pieces of choice (I prefer pecans, but others like walnuts) to cinnamon and sugar mixture when you add the melted butter. The melted sugar and butter will coat the nuts. Pour over the dough balls as noted above. Bake as noted above.

Make a caramel or salted caramel topping – You may keep or omit the cinnamon in this step. Your choice. When sugar mixture and butter are melted and combined, slowly add ½ cup heavy cream. Boil for 1 minute, then remove from heat. Add ½ teaspoon salt to mixture and stir for salted caramel. Drizzle over dough balls. Bake as above.

Serve with butter and a large glass of milk or your favorite cup of coffee.

Enjoy!

unnamed

Standard
Empowerment, Food, Healthy eating

Starting Whole30 is HARD! (But the benefits are worth it!)

Let’s be honest. For many of us, eliminating grains, sugar, dairy, alcohol, legumes, and nasty food additives from our eating plans is not easy. “What will we/can we eat?” was the most common question Andrew and I asked ourselves during that first 30 days. I LOVE eating! Everything food – planning, cooking, eating – is one of my simplest pleasures in life. During my first 30 days of Whole30, I did not love to eat. I didn’t even like thinking about food. Which meant that I thought about food CONSTANTLY! My digestive system wasn’t happy with me either (diarrhea and constipation are both common as your body removes toxins and inflammation subsides) and I had an almost constant low-grade headache. I was HANGRY! (hungry and angry – well crabby, really,… actually REALLY CRABBY! CRANGRY?).

Everything I read on all the forums said, “Just stick it out. It will get better!” I kind of hated those positive, perky people. But they were right. For me, it took 5 weeks, but my digestive system moderated itself and my headaches decreased, then finally went away all together. For Andrew, headaches were the issue; headaches both that got him to try Whole30 and were his main side effect. They subsided after 3 weeks. Note: this was OUR experience. Some people don’t have any negative symptoms at all.

The biggest mistake we made during those first 30 days was overusing specific foods because we COULD eat them, and it was almost overwhelming early on to identify what we could eat. One example of our overusing permitted foods was coconut. I have always loved coconut. After 30 days of coconut yogurt, coconut oil, coconut cream, coconut milk, shredded coconut, coconut aminos, coconut manna, etc., I was OVER coconut. I still am. One of my goals with this series of blog posts will be to help you avoid that particular pitfall by sharing with you a variety of foods that we’ve grown to love that are Whole30 compliant, easy to make, and tasty. I’ve come to believe that the key to surviving those first 30 days is variety.

Starting Whole30 required some very significant changes in our eating patterns. For Andrew, sandwiches were a lunch staple. Thai restaurants were our favorite, as were rice based meals we made at home. Soy sauce was a staple. Andrew enjoyed cereal and milk. My favorite treats were a glass of wine and a piece of chocolate. Pasta was my comfort food. I made the best homemade macaroni and cheese you can imagine. Even foods that were generally on the right track had noncompliant ingredients. We had to read the labels on everything.  In short, we had to completely rethink our eating plan. To be honest, we just jumped in with both feet. We weren’t prepared. Preparation would have made this much easier for us. Preparation is helpful!

We feverishly scanned the internet for food lists, shopping lists, recipes. It felt overwhelming. Whole30 does really well with all this now. Check out their webpage. https://whole30.com/pdf-downloads/ for useful check sheets. They are also now partnering with a variety of food product providers whose foods have been identified as Whole30 compliant. You can find an updated list here: https://whole30.com/whole30-approved/.

If you’re interested in starting this journey, let me know. Support is key and I’ve been there! Here’s my story: https://dballardreisch2.com/2018/10/24/my-whole30-journey-reclaiming-my-health/. Whole30 has worked extremely well for Andrew and me. I feel healthier than I have in years and what I assumed were just symptoms of aging have disappeared. It might be just what you need! All you have to do is commit to 30 days of eating differently.

Finally, here is one of Andrew’s delicious recipes to get you started. All of Andrew’s dishes and easy to prepare and typically can be made in ½ hour or less.

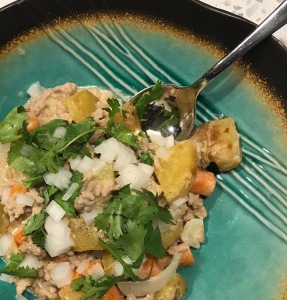
Andrew’s Thai yellow curry and veggies with optional cauliflower rice
Ingredients:

2 lbs ground pork
2 cans Savoy coconut cream
3 tbsp Mae Ploy Yellow Curry Paste (more or less to taste)

1 orange bell pepper (rough chopped – big pieces)
1 green bell pepper (rough chopped – big pieces)
½ large white onion (rough chopped – big pieces)
1 yellow squash (halved and sliced)

Note: We prefer coarsely chop veggies for this dish.

Process:

Cook pork in large skillet – Drain fat when cooked thoroughly

Add coconut cream and yellow curry paste and stir into pork

Stir and let simmer 2 minutes

Add vegetables and let simmer until vegetables are cooked to your liking. We like ours more al dente

Garnish:
5 green onions (diced)
1 cup cilantro (chopped)

Note: If you just can’t imagine Thai food without rice, try cauliflower rice.

1 head cauliflower

Cut cauliflower into chunks. We don’t recommend already chopped cauliflower as it seems to get mushy (too high a water content, we think). Pop the chunks into your Bullet or other blender. Blend for 30 seconds or until desired consistency.

When curry is done, put raw cauliflower into the bottom of each bowl, put curry on top. Stir. Enjoy!

Andrew's Thai curry

Standard
Food, Healthy eating, Quality of life

Deborah’s Whole30 Chuck roast & veggies

This is the perfect, hearty meal for a cold autumn or winter evening, or Sunday dinner. IMG-5518.JPGWhen I was a little girl, one of my favorite meals was beef roast cooked with potatoes, onions, and carrots. My mom had a special skillet with a lid that she used to make this feast. The smell in the kitchen was heavenly almost as soon as she put the skillet into the oven. For me, this was comfort food.
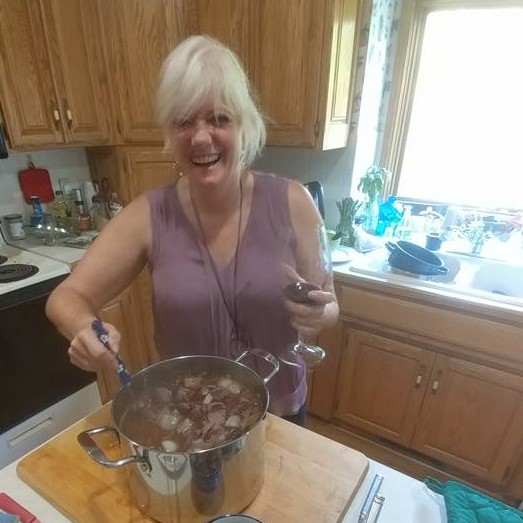
I hadn’t made this meal for a number of years, making soups and stews out of beef roasts instead. Several months ago, Andrew mentioned that he loved beef roast with veggies. As we shared our stories it became clear that we were talking about the same favorite meal, down to the flavor of the potatoes and carrots after roasting in the beef broth. We only had to give up two parts of the meal, mashing the potatoes and carrots together and smothering them in butter, salt, and pepper, and making gravy (there are Whole30 gravy recipes, but this is so delicious, you won’t need one). Surprisingly, we liked the potatoes and carrots just as well without the butter and the beef broth is very flavorful. This delicious dish has become one of our favorites.

Ingredients:

1 – 3-5 lb chuck roast (or beef roast of choice) ((Pick the size appropriate for your family.))

1 lb potatoes of choice (we like Idaho potatoes or goldens)

1 lb whole carrots (Peeled carrots are too sweet for our taste. But use what you like.)

2 large white onions

Salt, pepper, garlic to taste

We prefer:

Pink Himalayan salt (we use Sherpa brand and use a salt mill)

Quad-color pepper corns (we use Olde Thompson Pepper Supreme and use a pepper mill – I got this at Bed, Bath & Beyond last Christmas.)

Granulated garlic (we use Kirkland’s brand – available at Costco)

Preparing the meal:

Trim any excess fat off the outside of the roast

Sear the roast

Using a heavy skillet, heat on high heat on the top of the stove. Once the skillet is hot (sprinkle a couple drops of water off your fingers into the skillet. If they sizzle and evaporate, your skillet is hot enough), sprinkle the skillet liberally with salt and pepper.

Put the roast into the skillet and (using tongs) move it around to get all the salt and pepper on the side of the roast facing down. Sear for 30 seconds to 1 minute (until nicely browned). Add more salt and pepper to the skillet, flip the roast over and sear the second side, again moving the meat around with tongs to get all the salt and pepper on that side. Then, holding the roast with tongs, sear all the ends of the roast (10-15 seconds on each side).

Roast the beef

Put the seared roast into a roasting pan (with cover) big enough to allow for the addition of vegetables later. I prefer to put the roast in the bottom of the roasting pan.

Season the top side of the roast liberally with season salt (choose 1 without sugar or corn starch to be Whole30 compliant) and granulated garlic (We prefer Kirkland’s brand – available at Costco.), or whatever spices you prefer. (We also like McCormick Grill Mates Montreal Steak Seasoning.) Make sure to check spice labels for added sugar or corn starch. Avoid these. Many blends have both, so you might want to use seasonings individually.

Add 2 peeled, white onions (We prefer large chunks, so we cut 1 in quarters, the other in 8ths.)

Add 1 cup water.

Bake UNCOVERED in preheated 450° oven for 1 hour.

Flip the roast and season the second side with granulated garlic and season salt.

Prepare and add the vegetables

About 45 minutes in, begin to prepare your vegetables.

Use 1 lb of your favorite potatoes (or sweet potatoes). I prefer the “rustic” feel, so I don’t peel my potatoes. Wash them well and halve or quarter them.

Use 1 lb of carrots (unpeeled, whole). Wash them well and halve them. I usually scrub them with a scrub sponge to get all the dirt and root pieces off.

Add potatoes and carrots to the roasting pan. Add another cup of water. Salt and pepper vegetables to taste (Again, I’m pretty liberal as everything seasons everything else as well as the broth.). COVER the pan!!! This is important as the flavors and spices baste in the covered pan throughout the rest of the cooking process. Note: If you don’t have a covered roasting pan, aluminum foil will work as well. You want the juices and steam to stay inside the pan.

Reduce oven heat to 275° and cook COVERED for 1 hour. Check veggies and roast for desired doneness. For me, perfect doneness is when a fork goes in easily and doesn’t crumble the potatoes or carrots. Cook longer if needed to reach desired veggie consistency.

It’s not uncommon for the veggies to be done a bit before the roast. No problem. At 1 hour or desired doneness, remove veggies from the pan and put them in a covered dish in the microwave (or on the counter with a towel over the covered dish). (Just let the veggies sit, covered until the roast is done to your desired temperature).

I generally prefer my roasts to be fork tender, meaning that when I put a fork into the meat and rotate it, the meat pulls apart easily (probably about medium. I’m not a fan of pink, squishy meal, but I want it to be tender, juicy, and close to pullable).

Food Safety

If you use thermometers, the Food and Drug Administration (https://www.fda.gov/food/resourcesfor you/healtheducators/ucm082294.htm) recommends cooking beef to 145° F (63° C) for food safety. According to Certified Angus Beef (https://www.certifiedangusbeef.com/kitchen/doneness.php), the temperature range for beef roasts is:

145° for medium

150° medium well

160° well

Note: take the roast out of the oven at these temperatures. They will reach your desired temperature after resting for 5-10 minutes.

Note: The au jus (broth) from the pan will be delicious and can be spooned over the roast, potatoes, and carrots to enhance their flavor.

Note: You can also make this meal in a crockpot. Sear and season the roast as described above, put everything in the crockpot at once. (I put onions on the bottom, then the roast, then potatoes, carrots, and more onions on top. Add 1 cut water. Set cooking time to desired dinner time. I start mine in the morning and let it cook all day (7-10 hours). The meat is pullable when I get home and everything is juicy and delicious.

You can complement this meal with a side salad or other veggie, but my family prefers just this. The recipe above provided food for one dinner and several lunches over the next couple days for 3 adults. If you like leftovers, add more potatoes and carrots. The meat is also great later, sliced on a salad.

Enjoy! More Whole30 meals to come!


Standard
Food, Healthy eating, Quality of life

My Whole30 journey: Reclaiming my health

IMG_7733

Last January (2018), my partner Andrew and I were settling in to what we thought “aging” meant. We both had migraines or headaches regularly. I had recurrent aches and pains in my left hip, right knee (on which I’d had surgery years ago), right ankle (which I’d sprained multiple times), right heel (which hurt with every step I took). I hated the idea that chronic pain was going to be a way of life for us to manage. Over Christmas, we’d spoken with Andrew’s daughter Tiffany who was using the Whole30 eating plan. (I don’t call it a diet for reasons that will become clear.) She indicated that her migraines had significantly reduced in frequency and that she felt better than she had in a long time.

We were curious, so we started to read. The idea behind Whole30 was that many people have food sensitivities that they are unaware of. Some of these sensitivities cause inflammation. The invitation is the dedicate 30 days. During that time, you eat no grains, no sugar, no dairy and you avoid processed foods, eating as naturally as possible. This means checking ingredient lists and becoming aware of what is actually in the food you eat. Then after 30 days, once your body has had a chance to eliminate all toxins and remnants of food to which you might be sensitive, you can begin to slowly, one by one, add foods back in again, remaining aware of your body’s response. When you find something that your body is sensitive to, you eliminate it from your diet permanently. If you’re not sensitive, you can add it back in.

This sounded grueling (What?! NO CHOCOLATE?! NO WINE?! NO RICE?! NO BUTTER?! Then what will we EAT?!!!) Then again, it was ONLY FOR 30 DAYS! I could do anything for that long. To be honest, for us the first 30 days were hard, but we’ve learned a lot since them and plan to share our insights with you to make things easier.

Here’s the real deal! Now, 10 months later (and this has been true for some months now), both of us have fewer headaches, less severe seasonal allergies, and for me, NOTHING HURTS ANY MORE. Not my hip, not my knee, not my ankle, not my foot, and I typically walk at least an hour or two a day as part of my commitment to my mental and physical health. Walking is my processing time, my creative time, my grounding time. I feel healthier than I have in years and I hesitate to mention this, but as an interesting side effect, I’m 3 sizes smaller than I was last January. I need to be clear. My goal was not to lose weight. I have no idea how much I actually weigh as I don’t have (or want) a scale. Losing weight just happened. I think that when we get all the crap out of our food, our bodies are healthier. We feel better. Our bodies function better. I think health comes in a variety of sizes. I was just surprised to have lost weight without prioritizing doing so. The only reason I know I’ve lost 3 sizes is that I got to the point this last weekend when the skinniest of my skinny pants hung off my hips and I could pull them on and off without unfastening them. I hadn’t allowed myself to buy any new clothes, but I thought it might be time. I bought 2 pairs of jeans, a shirt, and 2 pairs of boots (No my feet didn’t shrink. I was just celebrating how great I felt and that I could wear shoes other than the Brooks and Chacos I’d been relegated to all spring and summer because everything else hurt my foot).

I should note that I also have issues with all the manipulation the food and agricultural industries do to our food. GMOs, additives, preservatives, hormones, antibiotics, all impact our bodies. While I cannot live, as some of my friends do, on food I grow myself, I do try to eat fresh, organic, non-processed foods as much as possible and I try to shop locally. (I love local farmers’ markets.)

After 30 days, we decided to do a second 30 days. We were seeing improvement in inflammation, digestion, a decrease in headaches, and we were feeling better than we had before we started.  If you’re interested in this journey and seeing what Whole30 can do for you, follow along and I’ll lead you through our experience, making things as straightforward and easy for you as I can.

Onward! To our health!

Standard
Easy Recipes, Food, Fresh made soups, Friends

Graduate School, Cooking with Friends, and Coq au Vin

My love affair with coq au vin began at a particularly difficult moment for my then younger self. I was inching in on finishing my master’s degree in communication at Ohio State University in 1980. I defended my master’s thesis and my committee gave me 6 reasonable changes. Except, at that point, I wasn’t reasonable. I was tired. The typist for my thesis, my friend Rick, was tired. There was a lot of political scrambling in my academic environment which was very uncomfortable. Competitive professors didn’t want students to work with other professors, a competitive graduate student culture, demands on my time as a speech coach. I wanted to be done. So,… I decided I was. I went home from my defense, opened the door to our house and said to my typist and my roommates “I quit! I don’t need a master’s degree and I don’t have anything to prove to anyone. They were stunned into silence.” My roommate Trish, rarely lacking for words said, “Awesome! Let’s party! I want to make coq au vin. Where’s the wine?” As she and our roommate Mimi started preparing food, Rick helped me box up everything related to my thesis and put it in the basement. I was done! I felt free! It was exhilarating! That day we cooked; laughed; drank wine (a lot of wine). We invited friends over and played in the rain. I breathed. We were all a bit (or a lot) “happy” by the time the coq au vin was ready, several hours later and together we enjoyed one of the best, most delicious, meals of my life.

Three years ago, my friends at Wichita State University, Mara, Glyn and I began a tradition of spending a day cooking together that we have done several times (but not nearly often enough). We begin the day at Mara’s with brunch, sometimes just the 3 of us. Sometimes with more friends. Mara always makes palachinque (Bosnian pancakes – which will be the topic of a later blog post); the rest of us bring whatever we want to eat with the pancakes. Then if we’ve decided what we want to cook, again with wine, usually also with music and dancing, always with laughter and friendship, we cook dinner together. The first time we cooked together, I told my graduate school story as we were trying to decide what we wanted for dinner. That did it. The decision was made. Coq au vin it would be. It was a wonderful day and the coq au vin was as delicious as I remembered.

The third time I made coq au vin, again for my friends on one of our cooking days, my last as a resident of Wichita, was in celebration of my birthday, my retirement, and my moving to Colorado. For more on my retirement decision, click here: The three of us shared a delicious brunch and couldn’t decide what we wanted to cook. We reviewed what we’d made on prior occasions: pilaf, curry, cioppino, pasta… Mara looked me in the eye and with great certainty said, “Coq au vin. I want coq au vin. Let’s go shopping,” And off we went.

Throughout the day, more friends came and left, Jan, David, Carolyn (a new friend), Randa, Julie, Jeff. They wrote to me on a “Congratulations on your retirement, Happy Birthday, Good luck on your move” poster Mara had taped to the wall. Like always, we laughed; we danced; we talked; we ate; we drank wine; we prepared more food; we ate some more.

Glyn acted as my sous chef and we spent the day in Mara’s open kitchen preparing food while our friends floated in and out, enjoying all the tasty food everyone had brought. Food made in an atmosphere of love and friendship always tastes the best! It was another precious day!

Coq au vin is typically a rustic French chicken and wine stew with mushrooms, onions, carrots, and potatoes. We had salad, roasted vegetables, hard bread, more wine. Purists make coq au vin with bone-in chicken. I’ve done that twice and the recipe below is my newest modification, boneless chicken. I prefer this version for a number of reasons, most important, how much more quickly the chicken cooks, and how much easier it is to eat. As always, I perused various online recipes for inspiration. Our basic recipe was inspired by Ina Garten’s: http://www.foodnetwork.com/recipes/ina-garten/coq-au-vin-recipe4-2011654, Alton Brown’s:  http://www.foodnetwork.com/recipes/alton-brown/coq-au-vin-recipe-1952021, and the New York Times recipe: https://cooking.nytimes.com/recipes/1018529-coq-au-vin?mcubz=3. Below I’ll share our portions in such a way that they can be halved or quartered for easy adaptation of the number of people you need to feed. We were cooking for 10 people and hoping for leftovers.

Ingredients and preparation:

1 pound thick cut bacon (based on the theory that one can never have too much bacon) sliced into ¼ inch strips)

6 skinless, boneless chicken breasts (washed, dried, and cut into 2×2 inch chunks)

12 skinless, boneless chicken thighs (washed, dried, and cut into 2×2 inch chunks)

1 ½ pounds of cremini mushrooms (or your favorite type – washed, dried, sliced with stems – I always trim off the tip of the stems because they are typically dried out)

1 pound of carrots (cut into 1 inch chunks – we cheated and got the peeled baby carrots – they worked perfectly)

2 large yellow onions (or 1 onion and a bag of pearl onions – 1 peeled and cut into chunks, the other roughly sliced – pearl onions replace the roughly sliced onion)

16 oz container Italian spiced tomatoes (optional – I prefer spiced tomatoes with garlic, oregano, and basil)

3 Idaho potatoes (optional –  can be peeled or unpeeled, cut into rough 1 inch chunks) ((We decided to serve the dish with fresh Italian pasta, so I didn’t add potatoes))

1 bottle dry red wine. We used Malbec (our favorite)

1 cup plum brandy (You can also use any type of brandy, cognac, etc. – we used what we had on hand)

Salt and pepper to taste

1 handful of fresh Thyme (washed, uncut – about 1-2 oz – 12-15 sprigs)

1 ½ tablespoons Garlic (Spice World Minced garlic or 5 or 6 fresh cloves)

Olive oil (as needed)

8 oz Chicken Stock

3 (or 4) tablespoons salted Butter

1 ½ tablespoons Flour (your favorite – All-purpose flour works fine)

*********

2 pounds hearty pasta (your choice – this is a hearty dish, so you want a hearty pasta to go along with it – rigatoni and cavatappi ((which we used)) are examples. I prefer Italian pasta (as in pasta made in Italy).)

Making the dish:

  1. After preparing all ingredients above, salt and pepper chicken to taste and set aside
  2. Preheat oven to 250°
  3. Fry bacon in a heavy skillet (cast iron works well) on medium high heat until crispy (About 10 minutes) (Everything will be prepared in this skillet until we transfer it to a stock pot to put into the oven. It will be used again when we saute the mushrooms and onions. Don’t wash it!) Set aside.
  4. Brown chicken pieces in bacon fat until golden brown on all sides. (About 5 minutes per skillet – we browned about 3 skillets of chicken for this recipe.) Set aside.
  5. Salt and pepper all veggies to taste. Add veggies (carrots, potatoes ((optional – great if you don’t serve with pasta)), onion chunks ((reserve the onion slices for later)) to remaining bacon grease.  Saute for 10-15 minutes until carrots are just softening, potatoes are still crunchy, and onions are lightly browned.
  6. Add chopped garlic and cook for 1 additional minute
  7. Add brandy – make sure to scrape all the delicious chunks off the bottom of the skillet
  8. Transfer everything to the stock pot
  9. Add wine, chicken stock, and Italian spiced tomatoes to the stew – Bring to a gentle boil on top of the stove
  10. Add thyme and gently push into broth. Cook in the oven for 30-40 minutes until chicken is white inside, but still moist. (Note, the outside of the chicken will take on the lovely color of the wine.)
  11. About 20 minutes into the oven cooking time, saute the sliced mushrooms over medium heat in 2 tablespoons of butter (About 10 minutes). (We used the cast iron skillet to take advantage of any remaining bacon juice and dripping residue. This is why you don’t want to wash the skillet.)
  12. Add sliced onions to the mushrooms and saute for the last 3 minutes of the mushroom cooking time. (Add another tablespoon of butter as needed.) Set aside.
  13. When the chicken is done, remove the stock pot from the oven and place it on the already medium hot burner. Remove the thyme. (If some stalks are left, people can just pull them out.)
  14. Combine 1 tablespoon butter and 1 ½ tablespoons of flour. Mix thoroughly and add to stew. Stir gently, but thoroughly.
  15. Add the sauteed mushrooms and onion slices to the stew. Simmer on top of the stove for roughly 10 minutes to allow the flavors to co-mingle. Stir occasionally.

*********

Prepare pasta according to package instructions. (For this dish, I prefer al dente – Cooked, but still firm.)

Serve hot in soup bowls either on top of the pasta or with the pasta on the side.

Enjoy!

Side dishes:

Wine – more Malbec or wine of your choice

Mixed green salad with lemon juice, olive oil, salt and pepper

Hearty bread

To make long stories more manageable. I did finish my thesis. In fact I went on to get my PhD (I built in 2 months of “unreasonableness” during my dissertation writing process, just in case I needed to “quit” again. I did!). I have had a wonderful career as an academic and now I’m moving on to new adventures with wonderful friends to visit in Wichita. This party was delightful and the coq au vin delicious! Memories, food, and friends. More of each to come!

Bon appétit!!!

Standard
Easy Recipes, Holiday cheer, Peppermint Bark, Uncategorized

Deborah’s Peppermint Bark

Peppermint Bark #1

I LOVE the holidays! I love cooking and baking! I love giving pretty food to my friends and family. One of my recent favorites is Peppermint Bark. There are many versions of Peppermint Bark out there. I used to be intimidated to make it because I thought it was difficult. SURPRISINGLY, IT’S NOT! Even if you choose to temper your chocolate so that it won’t melt at room temperature, it’s not difficult or especially time consuming.

I tried the results of this recipe out on some of my colleagues yesterday and everyone loved it, so here’s what I do!

Ingredients:

3 cups of dark chocolate – (I used Cocoa Dolce 54% Dark Chocolate Callets – Use your favorite chocolate!)

2 cups white chocolate – (I used Cocoa Dolce White Chocolate Callets – Use your favorite white chocolate!)

1/8 tsp peppermint oil – (You can use more. See below! I used Loranss Peppermint oil)

14 –candy canes crushed (traditional)

Here’s what you do!:

Crush the 14 candy canes – I use the plastic bag and a hammer method. Crush to your desired level of crunchy. You can also do this in a blender or food processor.

Temper dark chocolate* – Melt 2/3rds of the chocolate over a double boiler (medium setting on an electric burner) ((What I do is put water in a larger pan and put my chocolate in a smaller pan, letting the warm water in the lower pan melt the chocolate in the upper pan.)) – When the chocolate is melted, check the temperature – You want it at 115 degrees exactly (use a candy thermometer). Take the small pan out of the large pan and stir in the remaining 1/3rd of the chocolate until melted.

Check the temperature when this step is completed and all chocolate is melted. If the temperature is below 90 degrees, heat again (on the double boiler – return the small pan to the large pan of medium heat water) until the chocolate reaches 90 degrees.

If it’s still above 90 degrees when all the chocolate is melted together, put the pan in a cool water bath in the sink (about 2 inches of cool water – don’t let any water get into the chocolate), stir the chocolate constantly so that the temperature remains consistent throughout. When it reaches 90 degrees, remove the chocolate from the water bath. DRY THE BOTTOM OF THE PAN (don’t ask me why I accent this. 8) ).

Spread the tempered chocolate across a parchment covered cookie sheet (you can also use aluminum foil if you don’t have parchment paper) Layer the chocolate to about 1/8th inch deep (don’t worry if it doesn’t reach the sides. You will shatter it into pieces later anyway, so it doesn’t have to be neat.).

Put it in the frig for no more than 5 minutes to set it up a bit. If you leave it in longer, the white chocolate may not stick to the dark.

Simultaneously (as you put the dark chocolate in the frig):

Temper white chocolate – Melt 2/3rds of the white chocolate with peppermint oil added to 115 degrees (using the double boiler method outlined above). Stir in the remaining 1/3rd of the chocolate away from heat.

Check the temperature:

If it’s below 85 degrees, heat again until it reaches 85 degrees.

If it’s above 85 degrees, follow the cool water bath outlined above (under dark chocolate) until the chocolate reaches 85 degrees. Smooth the white chocolate over the cooled dark chocolate.

When it’s 85 degrees, smooth the crushed candy canes over the top of the spread white chocolate.

Refrigerate for 1 hour or until the bark is completely cooled and set. Break into pieces.

Peppermint Bark #2

*Tempering makes your chocolate really creamy and it holds up better at room temperature.

There are multiple options to this recipe.

Modification #1: Mix ½ of the candy canes into the cooled white chocolate prior to smoothing it over the dark chocolate.

Modification #2: You could use all white chocolate in this recipe

Modification #3: You could flip the amounts for a sweeter peppermint bark – 3 cups white chocolate and 2 cups dark chocolate

Modification #4: You could do a top layer of dark chocolate or invert the layers and have 2 white chocolate layers.

Modification #5: You could omit or add more peppermint oil – up to 1 tsp peppermint oil. (To determine how much peppermint oil you want, stir it by 1/8 tsp increments into the white chocolate. I went for the milder version. If you omit the peppermint oil, your peppermint flavor will come completely from the candy canes.

To me the holidays are about sharing food I love with those I love. I welcome you to share in this tradition! Happy Holidays!

Peppermint Bark with Angel


Standard
Food, Fresh made soups

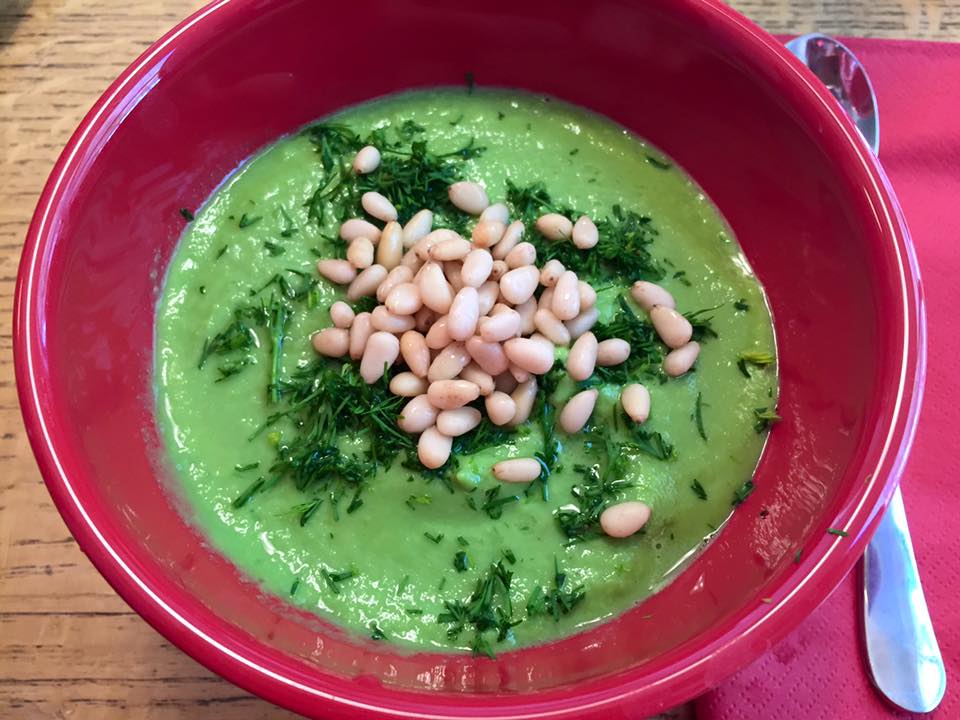
Cooking with Mary #4: Cilantro-Celery-Lime Soup (Fresh and Delicious!)

This creamy, cool, refreshing, cold soup is perfect on a hot summer day! It took a while to eat all the leftovers from Gazpacho and Borscht (see prior recipe posts). The gazpacho made for a nice second day lunch for Mary and me (about 1 quart of soup leftovers). The borscht made enough to both share with Mary’s friends and for Mary and me to have lunch a second day (a little over 3 quarts of leftovers). The last soup in our food preparation from scratch vacation was another cold soup. It’s fast and easy to prepare. The recipe for Cilantro-Celery-Lime Spring Soup we made was only enough for one lunch, so I doubled it here. You’ll thank me for this; I promise. J  The inspiration for this recipe was “In the Raw’s” Clear Celery Soup recipe found here: http://earthmother-intheraw.blogspot.com/search/label/soup. There are many more delicious raw recipes on this site!

Our version of this soup is not clear, but creamy, and again, we modified ingredients to suit our taste. We added more celery, more lime juice, onion, garlic, and dill. We called it Cilantro-Celery-Lime Spring Soup because that name reflects the freshness and flavor in the soup.

Recipe:

2 avocados (peeled and pitted) I like avocados ripe, but not browning. It’s a delicate moment.

1 cucumber (unpeeled) My preference is English cucumber.

1/2 white onion

6 stalks celery (use from the center with leaves) The more celery leaves the better in my opinion. The leaves really enhance the flavor.

2 handfuls chopped dill (Be generous here!) ((Dill should really be in the soup name as it is the 4th dominant flavor.J ))

2 handfuls chopped cilantro (Be generous here!)

Juice of 3 limes

4 cloves garlic (smashed and finely diced)

Sea salt and pepper to taste

1 cup water

Put everything in a blender and puree. If you have a Magic Bullet ® or a Ninja ®, blending will be quick and easy. With a traditional blender, you will need to be patient and blend ingredients in batches. It still didn’t take that long.

Garnish with your choice of: chopped dill, radishes, pine nuts, lemon juice, sour cream, etc. Serve at room temperature just out of the blender, or chilled.

Unlike some green soups that taste like, well, grass, this one is refreshing and delicious! Enjoy! And, as always, if you try it and like it, let us know. If you have recommendations for improving in, we want to hear those as well!

Buon Appetito!

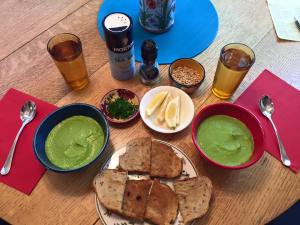
green soup lunch

Standard
Food, Fresh made soups

Cooking with Mary #3: Borscht!!!!!

Few Russian dishes are more iconic than borscht, Russian beet soup. Typically made with beef and beef broth, borscht is a gift to the palate. I fell in love with it the first time our Tatar Babushka made it for us. We were fortunate when our family arrived in Kazan to have a built in family. Two years prior, a young student from Kazan State University came to study at the University of Nevada, Reno where I taught. Kazan State University is famous or infamous, depending on your point of view because it is the university that expelled revolutionary leader Vladimir Lenin when he was a student. It was also the third largest university in Russia and home to the renowned Russian mathematician, Nikolai Lobachevsky.

To make a long story short, we adopted Albert through a university program designed to give international students a local family to help their transition and expose them to U.S. culture. Our family never does anything halfway, so before you knew it, Albert was having dinner with us regularly, going on picnics, inviting us to his dorm for dinner (not the most tasty option, but it meant a lot to him to share with us). My children Stefan, age 6 and Alyssa, age 1, fell in love with Albert as he did with them. They were delighted to have a big brother. He often spent weekends and breaks traveling around the area with us or simply staying at our home. He became family.

Originally I was supposed to be posted in Kaluga, a small industrial city 90 miles south of Moscow for my Fulbright. Albert was going to live in our Reno house and find roommates to cover the mortgage payment. Shortly before we were to leave, my posting changed. We would be heading to Kazan and a built in family, Albert’s mother Zainob, Zainob’s father who we called Großvater (grandfather in German – to this day I don’t know why we referred to him in German), and Zainob’s mother who we called Babushka, a delightfully sweet and strong woman who was also a marvelous cook and a loving person. It was wonderful to travel half way around the world and find family.

As I said, Babushka loved to cook and her food was delicious. Her borscht had shredded beef, cabbage, beets, garlic, and was never complete without a dollop of Smetana (village sour cream) and some chopped green onions on top. It was one of my favorites.

For our purposes, Mary and I decided to make a vegetarian, gluten-free borscht. As I noted in my prior post, we used Olga’s recipe from her Fablunch.com site as our starting point.  Again, you can find her original recipe here:  

http://blog.fablunch.com/vegetarian-borscht-борщ-authentic-russian-beet-soup-recipe/

Here’s our version:

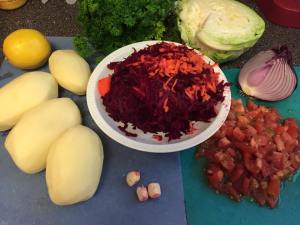
borscht fixings

Borscht

2 medium beets (peeled and shredded)

1 large carrot (peeled and shredded)

1 tomato (diced – Olga recommends peeling it. We didn’t.)

3 cloves garlic (smashed and chopped)

Saute above in 1 1/2 tbsp of olive oil plus 2 tbsp of water and the juice of 1/2 of a lemon in the stock pot in which you will make the soup. (5 minutes on medium/high heat)

Reduce heat. Cover and simmer for 20 minutes

Boil 1/2 gallon veggie stock in a separate pan; add 1 tbsp salt (Note: we did not season the stock at all as we prepared it.) ((See recipe in prior post)), or you can just use 1/2 gallon of water or store bought veggie stock.)) (((Note: the veggie stock really adds dimension, though. We think it’s well worth it.))). Add to veggies and stir in after they simmer for 20 minutes.

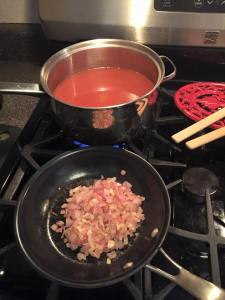
fresh stock with sauteed onions and garlic

Add 5 potatoes (peeled and diced) ((For a heartier soup, you could forego peeling the potatoes.))

Add 1/2 head of green cabbage, finely sliced.

Stir to mix ingredients thoroughly. Cook for 10 minutes.

Sauté 1 large finely chopped red onion and 3 smashed, then chopped, cloves of garlic in 1 tsp olive oil over medium heat. Cook until onions are translucent and turning golden. Stir into soup.

Add 2 handfuls of chopped fresh parsley

4 bay leaves

Juice from the other 1/2 lemon

1/2 tsp black pepper

Stir

Cook for 5-10 more minutes until diced potatoes are cooked, yet firm.

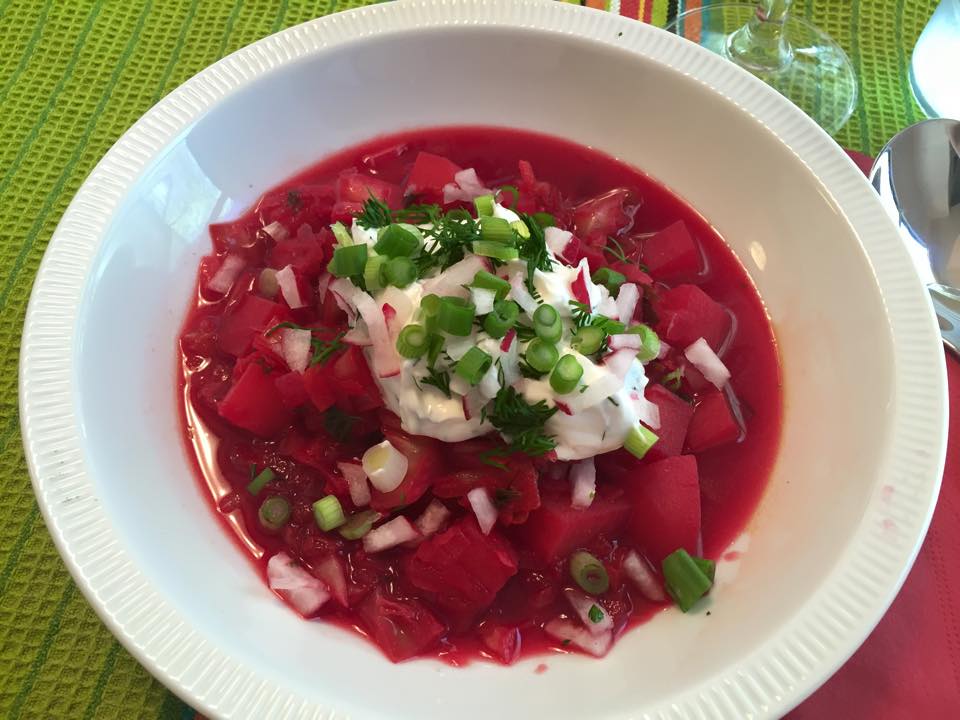
Garnish with sour cream, dill, parsley, chopped radishes, and/or chopped green onions. We stirred some of the dill and green onions into the sour cream, then added more as garnish.

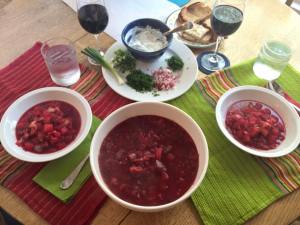
borscht lunch

This version of veggie borscht is flavorful, yet delicate. Mary and I think the dill and sour cream really set it off. We served it with European rye bread we’d picked up at the Saturday Central Phoenix Farmer’s Market (It wasn’t gluten free. It was delicious!!!) and a lovely bottle of Conundrum Red Wine.

If you try this, let us know what you think. As I noted in the last post, we ate it hot first and it was delicious. The next night we took it to a gathering of Mary’s friends and enjoyed it cold. Cold, it makes a perfect, refreshing summer soup. This soup made me smile with memories as we made new ones. I think Babushka would have been pleased.

Enjoy!!!

Standard
Food, Fresh made soups

Cooking with Mary: Part #2 – The Making of Veggie Stock for Borscht (Not as hard as you’d think!)

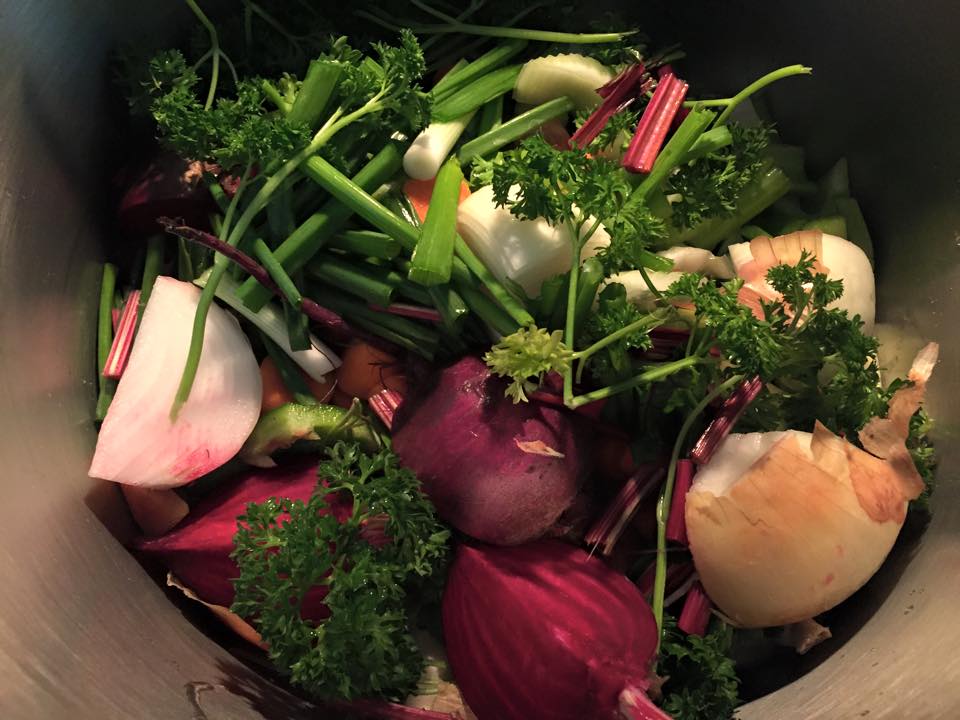
Borscht!!! A blog post in which I reminisce about delicious Russian and Tatar food and then cover the first of two detailed, but not difficult, stages in making this classic Russian standard. Borscht can easily be served hot (the way we ate it in Kazan) or cold (the way we ate it with Mary’s friends in Phoenix), and it is delicious both ways. In 1996-1997, I had a Fulbright Fellowship to teach and do research at Kazan State University in Kazan, Tatarstan, Russia. I returned in the summer of 2001 on a Fulbright Alumni Initiatives grant to carry out a women’s health study during which our team interviewed more than 1000 women. It’s been 14 years since I’ve been to Russia and the flavors I fell in love with still linger in my mind. The thought of my favorites dishes makes my mouth water. Triugulnik (meat, carrot and onion, or pumpkin and onion stuffed dough triangles – these were Tatar versions of pirozhki), manti (beef and onion stuffed dough steamed in a multi-level rice steamer), pelmeni, (dough stuffed with beef, then boiled in broth and served as a soup or strained, either version topped with smetana (Russian sour cream, perhaps the most heavenly substance on earth) and chopped green onions, polv (beef, carrots, onions and rice cooked in beef broth). Our favorite pirozhki which my Tatar son Albert, Stefan, Alyssa and I made for school events at Mountain View Montessori School in Reno, Nevada, was rice, egg, and green onions wrapped in dough and baked. The kids loved them! But today, our topic is the second soup my dear friend Mary and I made during our “soup from scratch” adventure in Phoenix, borscht!!! As Mary is a vegetarian and as our goal was healthy eating, we chose a vegetarian version that is also gluten free (although, to be honest, I’m not sure what gluten would have been added anyway). Since we were looking for such a precise recipe, we stopped with the delightful version outlined by Olga, self-proclaimed foodaholic, and author of the food blog Fablunch. Here’s the link to Olga’s recipe: http://blog.fablunch.com/vegetarian-borscht-борщ-authentic-russian-beet-soup-recipe/ We decided to take the recipe up a notch as Emeril would say and make our stock from scratch as well. Neither of us had ever done this before. As a base, we settled on a recipe for vegetable stock found on Bon Appetit. Here’s the link: http://www.bonappetit.com/recipe/vegetable-stock. As you would expect, we modified it “our way”. From the Bon Appetit recipe, we subtracted mushrooms (which Mary loves and I despise), fennel (which neither of us had ever cooked with, and as we had other preferred herbs and weren’t sure how fennel would go with beets, we left it out), and whole black peppercorns, although we did add pepper later. We added 1 bunch of green onions, a beet, and beet stalks. We put in more parsley and more bay leaves. If you’d like to compare the recipes more explicitly, the link to theirs is above. Below we outline what we did. Remember, we were making a broth for borscht, so beets were a logical addition. Veggie Stock In a large stock pot, we warmed 2 tbsps of extra-virgin olive oil. To the oil we added: Beet greens (stalks, not the big floppy leaves – we didn’t want it to get bitter) ((Our beets were large. If we’d had smaller, younger ones we would have included the leaves as well.)) 3 large Carrots (unpeeled – cut in 1 inch pieces) 10 stalks Celery (cut in 1 inch pieces) 2 White Onions (unpeeled and quartered) ((Feel free to use your favorite onions.)) 1 Garlic bulb (unpeeled, cut in half) 1 bunch Green Onions (cut in 1 inch pieces) 1 Beet (unpeeled and quartered) 1 Green Pepper (seeded and quartered) 2 large handfuls Parsley Cover and cook 5-7 minutes until vegetables start to soften a bit. Add 4 quarts of water and bring to a boil. Reduce heat and simmer, covered, until liquid reduces by half, about 1 ½ – 2 hours. If you need broth to reduce more quickly, take the lid off at 1 hour. Let broth cool, then skim out all vegetables and discard. They have given their all for your broth, color, texture, taste, nutrients. We then poured our broth through a fine strainer to get out any remaining “sediment” and let it cool on the stove covered overnight. We could easily have made the borscht right then, but we wanted it for the next day. The yield was just about 2 quarts. The stock had a very light flavor and we thought could be used as the base for just about any vegetable soup. veggie broth Next up: The making of borscht!

Standard
Food, Fresh made soups

Cooking with Mary: Part #1 – Icy, Spicy, Smooth & Crunchy Gazpacho Soup (YUMMY!!!)

Dear Reader,

From May 26-June 2, I spent an amazing week in Phoenix with my dear friend, Mary Elton. We wanted to make this vacation special.The last time we were together was for 10 days in Florence, Italy last October / November. Mary had plans for what she wanted us to do, places she wanted us see, to hike, to explore. These are our favorite things to do together. As we talked on my first night in Phoenix, a new plan emerged. We would cook together, soups, from scratch, that we had never made before. Our plan was gluten free (mostly), dairy free (mostly), delicious and healthy. Mary chose gazpacho; I chose borscht.

We wanted a basic recipe that we could embellish. I went to bed excited to start the recipe hunt in the morning. I woke up early, hopped on a Bing search on my iPhone 6s and started reviewing gazpacho recipes.

Mmmmm… GAZPACHO! … Just the word made me salivate. Images of icy coldness and spicy hotness, the crunch of fresh vegetables offset by a creamy tomato based broth propelled my search. Excited, I reviewed recipes on the first 6 cites that came up in my search, not counting Wikipedia. They were: Alton Brown’s recipe http://www.foodnetwork.com/recipes/alton-brown/gazpacho-recipe.html, Ina Garten’s http://www.foodnetwork.com/recipes/ina-garten/gazpacho-recipe.html, Food & Wine’s tempting array of gazpacho modifications http://www.foodandwine.com/articles/the-best-gazpacho-recipes, Ree Drummond, The Pioneer Woman’s http://thepioneerwoman.com/cooking/2009/06/gazpacho/, All Recipes http://allrecipes.com/recipe/gazpacho/, and Epicurious http://www.epicurious.com/recipes/food/views/gazpacho-51121580.

We decided we wanted to be gazpacho purists for this first effort, so the wonderful modifications on the Food & Wine site would have to wait. We were looking for a crisp, crunchy, cold vegetable soup with just the right amount of spiciness. The rest of the sites had similar recipes with more or less blending and slightly different ingredients. Mary and I found Alton Brown’s assembly video hilarious! Anyone who could make the intimidating task of soup crafting from scratch look easy worked for us. We used his recipe and techniques as a base and modify based on whatever inspired us at the moment.

Excited, we headed out to the Central Phoenix Farmer’s Market in search of fresh veggies and herbs. Unfortunately, the Wednesday market had discontinued due to the increasing heat and only the Saturday morning market remained. Undaunted we headed to Trader Joe’s and to the Phoenix equivalent of Kroger’s. As we walked the aisles, we strategized variations and enhancements we wanted to make. To Alton’s list of ingredients: 1 1/2  pounds of vine-ripened tomatoes, tomato juice, cucumber, red bell pepper, red onion, jalapeno, garlic, extra-virgin olive oil, lime juice, balsamic vinegar, Worcestershire sauce,  toasted, ground cumin, salt, black pepper, and basil for garnish, we added carrots, celery, green pepper (instead of red), parsley, cilantro, more basil, more lime juice, red pepper flakes, more garlic, and a can of whole, peeled plum tomatoes (because good tomatoes are hard to find outside farmer’s markets in Phoenix in May).

Here’s what we created and how we did it!

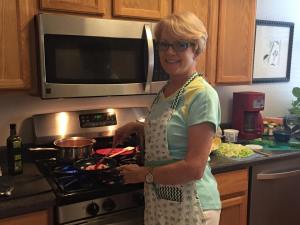
Chef MaryChef Deborah 2

Chef Mary                                                         Chef Deborah

Gazpacho Soup

First, the tomatoes:

Blanch, peel, core, and seed 1 & 1/2 pounds of tomatoes (Heirlooms would have been delicious, but we couldn’t find any.) Blanching makes peeling tomatoes easy! Bring water in a 4 quart pan to a boil. Cut off the stem and bottom tip of each tomato (keep these pieces as well as the skins and seeds in a fine strainer. You will extract juice from these pieces to use as broth for your soup), drop them in the water, boil for about 30 seconds, remove from boiling water and immerse in a bowl filled with ice and water. Once they cool, the skins peel easily. (If they dosn’t, you haven’t boiled them quite long enough. Pop them back in quickly. For riper tomatoes, this takes less time, for less ripe ones, more time. Be patient.) Next, cut each in half, pull out the core and any remaining seeds. Add to the sieve. Squeeze juice out of peel, seeds, and cores. I just used my hands for this. Alton says “add tomato juice as necessary to make 1 cup”. We didn’t need to. While our tomatoes were woefully lacking in flesh, they yielded a bit over a cup of juice.

Put everything, including juice, together in one large bowl

Tomato juice from peel seeds and cores

Tomatoes (chopped)

1 cup peeled, seeded and diced cucumber (Next time we probably wouldn’t peel it.)

1 large carrot (peeled and diced) – (1 cup)

1 stalk celery (chopped) – (1/2 cup)

½  green pepper (chopped) – (1/2 cup)

½  red onion (chopped) – (1/2 cup)

1 large, bright green jalapeno pepper – (seeded and finely diced)

2 handfuls chopped parsley

1 handful chopped cilantro

½ handful chopped basil leaves

2 cloves garlic

4 tsp Worcestershire Sauce

1/4 cup Olive oil

Juice from 3 limes

½  tsp ground cumin (We didn’t use smoked cumin as Alton recommended.)

2 tsp balsamic vinegar (Invest in an 8-10 year old one. It will be the perfect combination of tangy and sweet. Trust us on this one!)

1 tsp sea salt (Pink Himalayan is my favorite!)

½ tsp fresh ground black pepper (or mixed pepper)

½  tsp red pepper flakes

½  cup “Hot V-8 juice” (In addition to the 1 cup tomato juice)

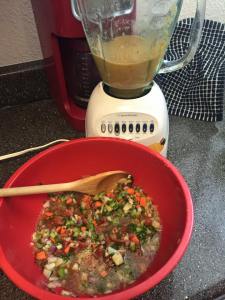
Once everything is mixed together, take 1 & ½ cups of the veggie mixture and puree in a blender. Stir back into everything else.

gazpacho fixings

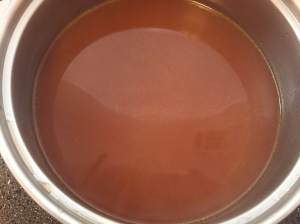
Because our pureed broth was such a lovely brownish – orangey color and because it had less tomato flavor than we desired, after we mixed all the ingredients together, we added 1 large can of whole, peeled plum tomatoes which we drained. We lightly blended them in the blender to add texture (We probably wouldn’t have had to drain these. And, if we had found meatier tomatoes, this might not have been necessary.)

Chill in the frig for 2 hours. Be patient. You want it cold!

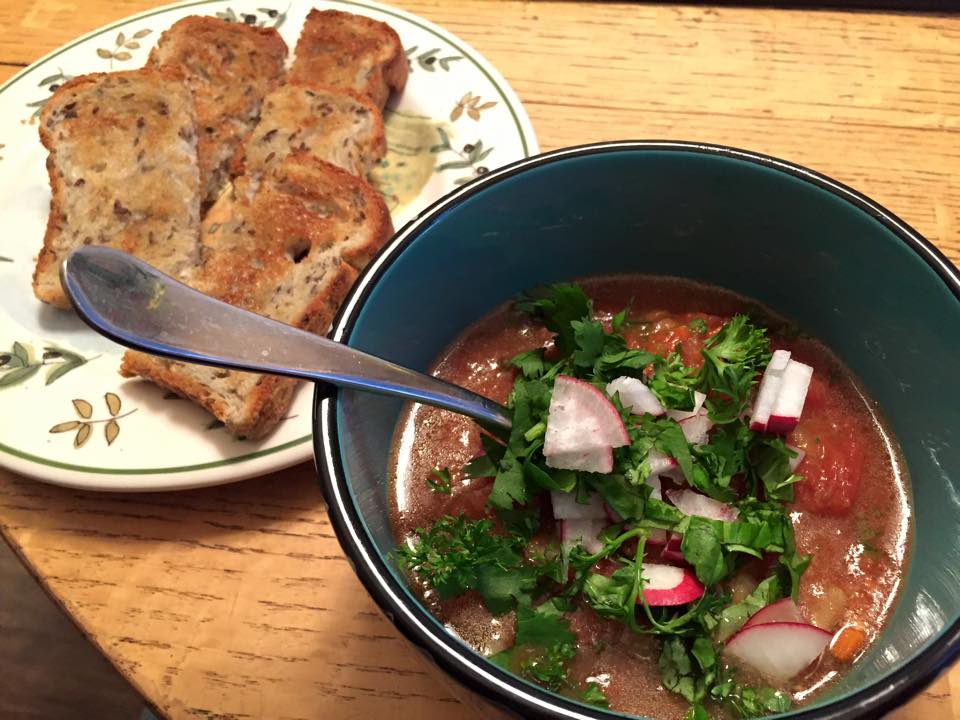
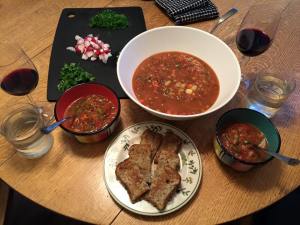
Garnish with chopped cilantro, parsley, basil, and radishes (or anything else that sounds good to you!) Trust us on the radishes. They add a nice additional take on spice and another delightful crunch. We completed our lunch with a sprouted Ezekiel trdat (gluten free) and a glass of Apothic Red wine.

gazpacho table

This soup was exactly what we hoped it would be, the perfect mixture of icy, spicy, smooth and crunchy. Next up, borscht from scratch including homemade veggie stock!

Enjoy!

Hey, if you try this, let us know what you think in the comments section. If you have amazing modifications, post those as well!

Standard